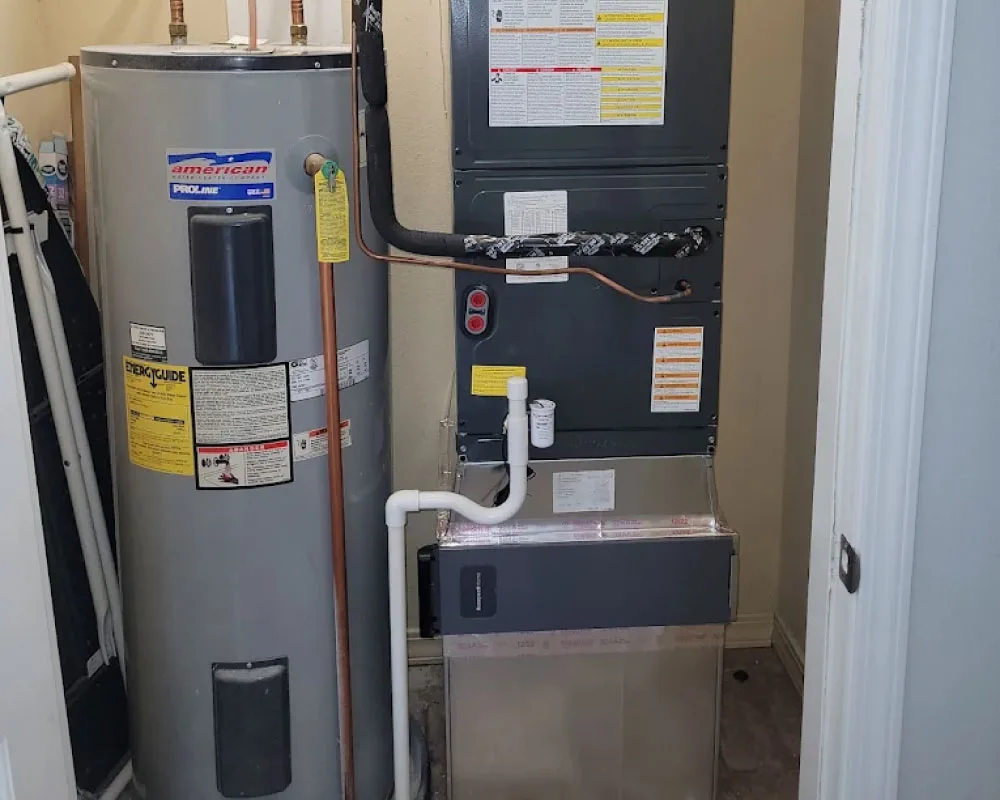
Tank Water Heater Maintenance
Tank Water Heater Maintenance Plans in Branson, MO
Your tank water heater works quietly in the background until it doesn’t. Annual maintenance—simple flushing and inspection—catches small problems before they become emergencies and extends your system’s life by years. We partner with you to keep your hot water reliable and efficient.
Schedule a Maintenance Visit
Why Choose Us
Why Branson Homeowners Trust Us for Tank Water Heater Maintenance
Annual maintenance is the simplest investment you can make to protect your water heater. Here’s what sets 360 Comfort Solutions apart when it comes to keeping your tank running reliably year after year.
Keep Your Tank Running Smoothly Year-Round
Annual maintenance is the simplest and most cost-effective way to protect your water heating investment. Whether your tank is brand new or showing its age, we’ll assess its condition and help you plan ahead.
Our Maintenance Process
What’s Included in Our Annual Tank Water Heater Maintenance
From pre-visit history review to final customer walkthrough, here’s exactly what 360 Comfort Solutions does during every annual tank water heater maintenance visit.
Step 1: Pre-Visit History Review and Scheduling Alignment
When you call to schedule maintenance, we pull your service history if you’ve had work done previously. We ask a few quick questions: Have you noticed any changes since your last service? Any noises, temperature fluctuations, or leaks? Does the hot water reach your fixtures as fast as before? These questions help us arrive prepared—we know whether to bring a replacement anode rod, plan for extended flushing time, or focus on specific diagnostics. We schedule maintenance during warm months (spring through early fall) when it’s convenient and doesn’t interrupt heating season. We block off 2–3 hours to avoid rushing; a thorough maintenance visit can’t be hurried.
- Review service history and prior findings (if applicable)
- Ask about recent changes in performance or comfort
- Note any unusual sounds, temperature shifts, or water appearance changes
- Schedule during non-emergency season when possible
- Confirm location, access, and any setup needs (basement access, shut-off valve location)
- Provide technician arrival window and emergency contact
Step 2: External Inspection and System Assessment
Our technician arrives and conducts a visual walkthrough of your tank and the surrounding environment. We look for: water pooling or stains indicating slow leaks; corrosion or rust on the exterior tank surface; sediment or mineral deposits at the base; venting issues (gas models) such as deteriorating vent pipe, blockages, or improper slope; connections that appear loose or corroded; evidence of water damage on floors or walls nearby. We check the thermostat setpoint and any digital displays for proper function. For gas units, we listen to the ignition spark and burner flame to detect clicking patterns (normal: one click then steady flame; abnormal: repeated clicking). We measure the room temperature and note any ventilation issues. We also check whether your gas shutoff or water shutoff valve is accessible and functioning properly.
- Visually inspect tank exterior for rust, leaks, corrosion, or mineral deposits
- Check surrounding area for water stains, mold, or previous flooding
- Verify thermostat display and setpoint accuracy
- Listen to gas ignition and note burner flame color and steadiness (gas models)
- Test shutoff valve accessibility and function
- Measure ambient room temperature and note ventilation conditions
- Document any changes from prior year (if applicable)
- Photograph any concerning conditions for the report
Step 3: System Performance Testing
We measure your tank’s readiness and efficiency. We turn on a nearby hot water faucet and time how long hot water takes to arrive (distance affects this, but >2 minutes suggests the system is slow to recover). We measure the outlet temperature at multiple flow rates to detect temperature fluctuation or instability—a sign of thermostat drift or failing heating element. For gas units, we test gas pressure at the control valve and compare to manufacturer specification. For electric units, we confirm the circuit breaker is properly sized and circuit draws are normal. We run the tank through a heating cycle (5–10 minutes) and observe temperature rise to confirm heating is active. We also test the temperature/pressure relief valve by briefly opening the lever to confirm water flows—if nothing comes out, the valve is stuck and must be replaced.
- Turn on hot water faucet and time temperature arrival (note if >2 minutes)
- Measure outlet water temperature at normal flow rate
- Measure temperature at reduced and elevated flow rates to detect fluctuation
- Monitor heating cycle for duration and recovery rate
- Test temperature/pressure relief valve operation (should drain immediately when lever is opened)
- Measure gas pressure and compare to spec (gas models)
- Check electrical circuit breaker size and condition (electric models)
- Confirm absence of error codes or warning lights on digital controls
- Note any performance changes from previous year visits
Step 4: Sediment Flushing and Anode Rod Inspection
This is the core of maintenance. We attach a hose to the tank’s drain valve at the base and allow sediment and water to drain into a bucket. We inspect the water color: clear to light tan is normal; rust-brown color indicates accelerated corrosion and means the anode rod is either depleted or failing. We continue draining until the water runs clear (typically 2–5 gallons in normal conditions; 10+ gallons if heavy sediment has accumulated). For stubborn buildup, we may use a circulation flushing kit to push water back through the tank and dislodge sediment. Once flushing is complete, we close the drain valve and refill the tank slowly. If the tank has an accessible anode rod (most tanks do), we inspect it visually or remove it to measure remaining thickness. A healthy anode rod is 1+ inch thick and shiny; a depleted rod is thin, pitted, or crumbling. If it’s depleted, we replace it immediately—this single component is your tank’s primary defense against rust.
- Position drain hose and open drain valve to capture sediment
- Observe water color and note sediment volume and appearance
- Continue draining until water runs clear (typically 2–5 gallons)
- Use circulation flushing kit for stubborn mineral deposits if needed
- Inspect or remove anode rod and measure remaining thickness
- Replace anode rod if depleted or corroded (typical replacement interval: every 3–5 years)
- Close drain valve and refill tank slowly to avoid air pockets
- Bleed air from hot water lines if needed
- Measure water pressure and note if regulator adjustment is needed
Step 5: Component Testing and Condition Documentation
We test all remaining critical components: we verify the dip tube (which directs incoming cold water to the heating surface on electric units) is intact by observing hot water recovery behavior. We listen carefully for abnormal sounds during heating: popping (sediment remaining on the bottom), hissing (possible internal leak or failing element), or banging (high water pressure causing pipe vibration). We check all water connections for drips or corrosion. For gas models, we perform a combustion analysis to verify the burner is operating safely and efficiently, and we check vent draw to ensure exhaust is exiting safely. We verify that no water is pooling or dripping anywhere in the system. We test the thermostat one final time by adjusting the setpoint slightly and confirming the system responds properly.
- Listen to heating cycle for abnormal sounds (popping, hissing, banging)
- Observe for any water drips or wet spots under or around tank
- Perform combustion analysis and vent draw testing (gas models)
- Measure water pressure and verify it's within 40–80 PSI range
- Check all visible connections for loose fittings or corrosion
- Verify dip tube is functional (electric models) by observing recovery behavior
- Test thermostat response by adjusting setpoint and confirming heating activation
- Confirm relief valve drain line is clear and not kinked
- Document all component conditions in writing
Step 6: Customer Walkthrough and Maintenance Plan Education
Before we finish, we sit down with you and review the findings. We explain what we found, what it means for your tank’s health, and what you can expect going forward. If flushing removed significant sediment, we discuss whether water softening might extend your tank’s life further (softening reduces sediment accumulation, especially in hard-water areas like Branson). If the anode rod was depleted, we explain that you caught it in time and replacement will prevent years of unnecessary corrosion. If we noticed early corrosion or mineral scaling, we’ll discuss how often you should plan to flush between professional visits (typically annually, or twice yearly in very hard water). We leave you with a detailed condition report including photos, a maintenance schedule, our contact information, and instructions for basic self-care.
- Review findings in plain language and explain significance for tank health
- Discuss anode rod remaining lifespan and replacement timing
- Recommend frequency of professional maintenance going forward (typically annual)
- Suggest water softening if sediment issues are accelerating corrosion
- Provide written condition report with photos and recommendations
- Explain what to watch for between visits (sounds, leaks, temperature changes)
- Leave emergency contact number and preferred scheduling time for next year
- Answer questions about tank lifespan, upcoming replacement budgeting, or upgrade options
Don’t See Your Location?
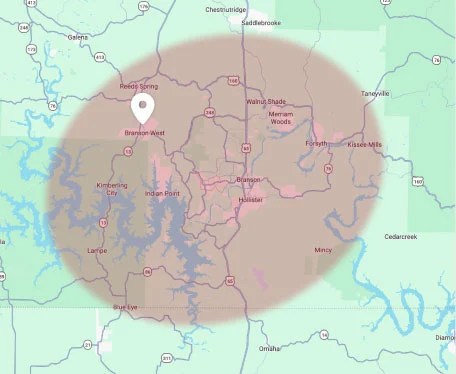
We may still be able to help! Give our team a call today to see if we service your neighborhood, and we’ll be happy to assist you.
Service Areas
Tank Water Heater Maintenance Service Areas in Southwest Missouri
We provide annual maintenance and tune-up service across the Branson region—from our home base out to the smaller communities along the Table Rock Lake corridor.
Proudly Serving Our Communities Around:
Other Locations We Serve:
Explore More
Complete Water Heating and Home Comfort Services
A well-maintained water heater is just one part of a comfortable home. Explore the related services we provide for homes and businesses across the Branson area.
Tank Water Heater Repair & Emergency Service
When your tank fails or runs cold, we diagnose issues and handle urgent repairs with same-day availability.
Explore Tank Water Heater Repair & Emergency ServiceTank Water Heater Installation & Replacement
When repair isn’t cost-effective, we install new systems properly sized for your household’s needs.
Explore Tank Water Heater Installation & ReplacementTankless Water Heater Systems
Considering endless hot water? We install and maintain tankless systems with the same expertise as tank models.
Explore Tankless Water Heater SystemsWater Conditioning & Softening
Hard water accelerates tank corrosion. Softening reduces sediment and extends your tank’s lifespan significantly.
Explore Water Conditioning & SofteningFurnace & HVAC Maintenance
Home comfort includes both heating and hot water. We maintain complete systems to keep your home comfortable year-round.
Explore Furnace & HVAC MaintenanceYour Tank Water Heater Maintenance
Schedule Your Annual Tank Water Heater Maintenance Today
Your tank water heater is built to last—but only if you give it the care it deserves. One annual maintenance visit prevents years of neglect from turning into an emergency. We’ll flush out sediment, inspect your anode rod, test every critical component, and give you a clear picture of your tank’s health and remaining lifespan. At 360 Comfort Solutions, we’ve been keeping Branson homes in hot water for 40+ years. Annual maintenance costs far less than emergency repair or replacement—and gives you peace of mind knowing a professional is watching your system on your behalf.
Questions & Answers